Save money with 3D nesting in selective laser sintering

How you can save money with 3D nesting


Maximize the use of the 3D printer's installation space! This is the most important principle for offering additively manufactured components at an economical price. You, too, can save costs when uploading your 3D data in our online 3D printing calculator by means of so-called nesting. Nesting describes the efficient nesting of your 3D printed components so that less space is used in the 3D printer. The aim of this article is to show how this works, what needs to be considered and how this can reduce costs.


Please note that from a technological point of view, the independent nesting of your components only works and makes sense for selective laser sintering (SLS) . *

If you want to learn more about the SLS process first, visit our technology page .

What is 3D nesting and how does it work?


In 3D printing, nesting describes the nesting of several components with one another so that their smallest enclosing cuboid, the so-called bounding box, is minimized. If, for example, When all individual parts of a rolling bearing are printed separately, their summed up bounding boxes are much larger than when the assembled components are printed. If only a single component is printed, the 3D nesting is irrelevant for the client. However, it can be useful for two or more parts.

With nesting, components can be manufactured more economically, which has a positive effect on their price. The background lies in the functionality of selective laser sintering . Here, the entire, rectangular base area is filled up layer by layer. Several components can thus be printed at the same time, with the number of components in the installation space being less of a factor in terms of costs. These are reduced when the components take up the smallest possible volume.

Even if there are other influencing factors on the component price in addition to nesting, this is probably the most important. In our cost calculation, the maximum dimensions of each direction are used to determine the bounding box, which is then matched with the actual component volume. Therefore, by cleverly nesting components, the free space of a bounding box can be utilized in such a way that hardly any additional costs are incurred for these additional components.

separate SLS Bauteile
gerenderte Darstellung genesteter Bauteile

What are the guidelines to follow?


So that you can make the best possible use of the advantages of nesting, we have listed some aids and guidelines here, which you should consider in advance:

Mindestabstand beim Nesting

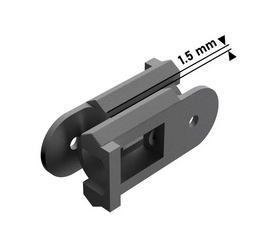
Compliance with minimum distances


For error-free printing, the individual components must have a minimum distance of 1.5 mm. If they are placed too close to each other, the individual parts can merge. Every order that contains several components should be checked in this regard prior to submission.

Ineinandergreifende Bauteile

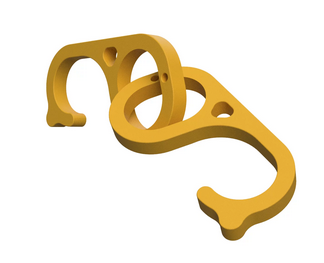
Trapped and interlocking components


When nesting components, it happens again and again that the minimum distance from one another is maintained, but these interlock like two chain links and therefore cannot be detached from one another after the printing process. Since such a bond is sometimes desired and printable - e.g. for chains - the assembly should always be checked for such misalignments before the order is placed. The same applies to trapped components. Here, a component is placed inside another body without providing a sufficiently large exit.

Gesamtvolumen beachten

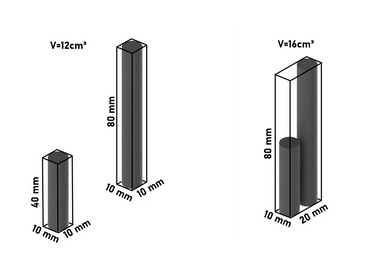
Always pay attention to the total volume!


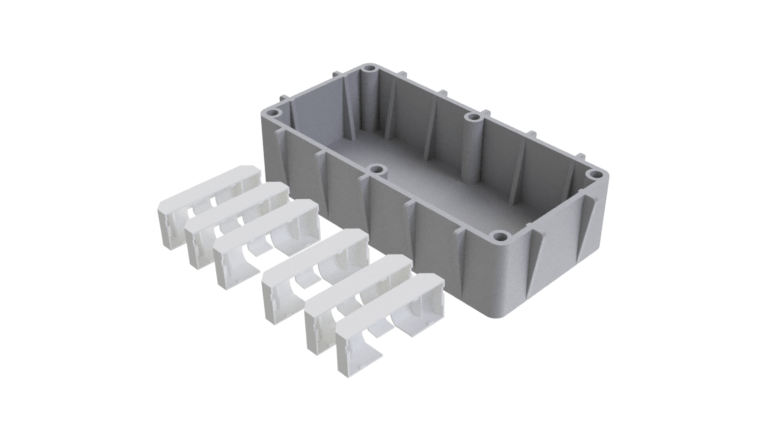
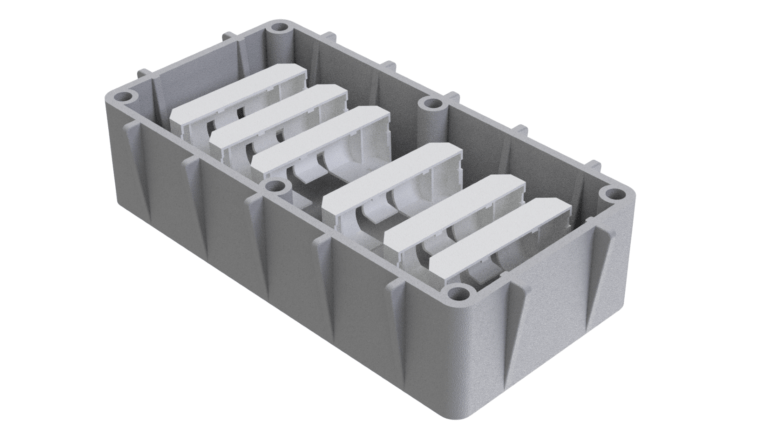
The basic idea behind nesting is to make the bounding box of the nested components smaller than the sum of the bounding boxes of the individual parts. Particularly in the case of rectangular or cylindrical components, the individual parts can have a smaller overall bounding box and are thus more economical to produce separately. Accordingly, it can be advantageous to leave the components separately or to create several groups of components.

Druckerabmessung

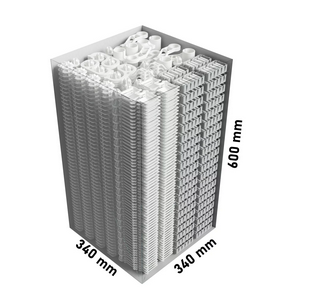
Adhere to the maximum printer dimensions


Depending on the production system, installation spaces of different sizes can be used. As a result, it is imperative that the maximum dimensions of these 3D printing systems are adhered to when nesting:

  • EOS P 110: 200 x 250 x 330 mm
  • EOS P 396: 340 x 340 x 600 mm

Nevertheless, the entire installation space should not be utilized to the utmost, because the component quality can vary considerably in the peripheral areas. We recommend keeping a distance of at least 10-15 mm from the specified dimensions.

If these steps are observed, nothing stands in the way of economical 3D printing. Happy 3D nesting!

* With the HP Multi Jet Fusion process (HP MJF), the costs are calculated primarily from the component volume, regardless of the bounding box. With fused layering (FDM), only one “layer” can be distributed on components and they are not stacked on top of each other. Accordingly, the nesting of components before the ordering process only makes sense with the SLS technology.

Not sure how you can achieve the best price for your part? - We're here to help!